
We’ve been talking about on and on that proportion is the key to draw a realistic artwork. Then, when you get the knowledge of it, shading is the enhancement to increase the realism of it.
Remember lines and circles are always our best friends when it comes to drawing and sketching, especially for beginners. Lines help us distinguish the proportion and circles help us how to curve the lines and create a 3D effect in shading.
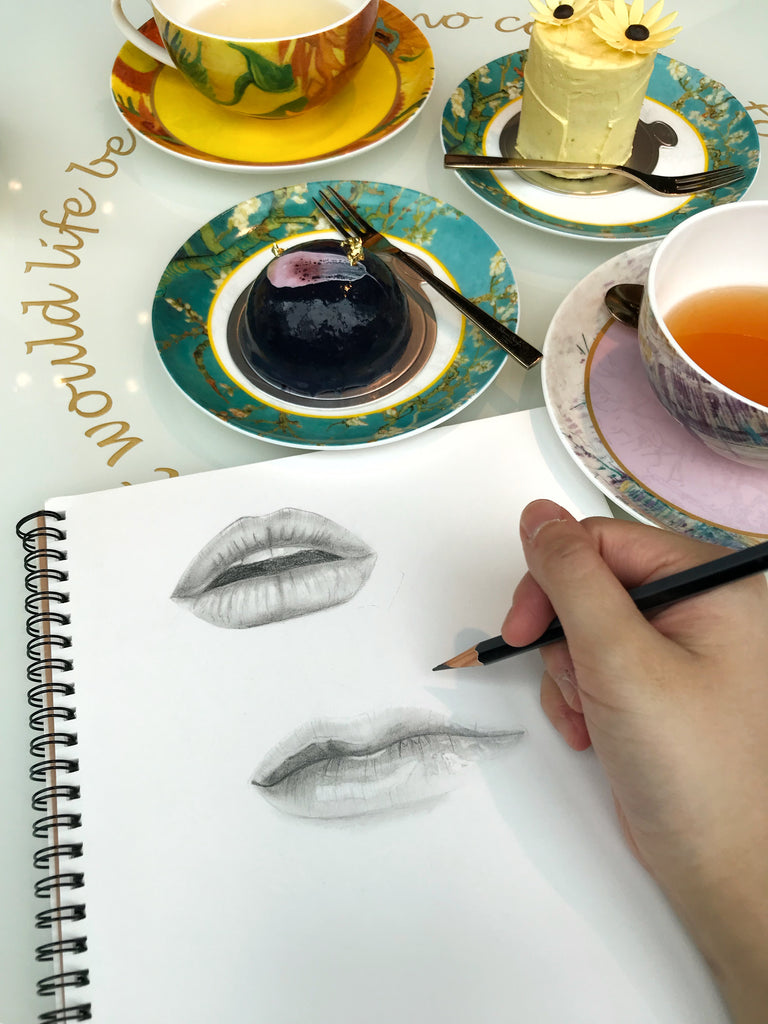
Today, we find two lips examples. One is from a lady with full lips. Another one is from a lady with thin lips and gradient lip makeup.
Full lips
Step 1: Outline the lips

To start with, draw the lines to separate the upper and bottom lips and their left and right.


Some people may draw two circles on the upper lips and one circle on the bottom lips to indicate how full and size are. This is optional and personal. To minimize this step, when we finish drawing the guiding lines, the cross, we can start shaping the lips by drawing the inner lines of the lips.

Afterward, draw the outer lines of the lips but only in the middle and slowly and draw the outer lines lightly.
Step 2: Building the shade
Start shading with H shade and paint it all over the lips. When it is done, you can use Q-tips or any blending tools to smooth out the harsh pencil lines and create a velvety effect.
In the darker areas, we can increase the shade by using darker shades gradually like HB, B, 2B, and 4B. The closer of the inner of the lips is, the darker should be.
Step 3: Drop the highlight

There are two ways that you can create the highlight. First, you can leave the white areas where the highlight places. Secondly, in our practice, we can use an eraser to do it. A flat or a small pointy eraser helps. Recognize where the highlight should be and erase the area lightly and gradually. Don’t worry if you erase too much. You can build up the shade again.
Step 4: Add the details
There are some lines on our lips. We may use HB or B to create the lines. However, for the darkest lines in the inner areas of the lips, we may use the shades darker than the B.
One thing you have to notice is that you should add the details according to the shapes of the lips. The lines are not straight but slightly curvy.
Thin lips
Step 1: Outline the lips

As you can see the picture, the view of the lips is not at the front but more on the left, so that right area occupies more on the image.

Same as the step of full lips, draw the guiding lines first to separate the upper and bottom lips and left and right sides. Then, start outlining the lips on the center.
Step 2: Building the shade
This lips make-up is different from the last one. The outer lips are paler than the inner and the pink color bit by bit increases on the inner lips.
In this case, you may focus on building the shade more in the middle of the lips.
Step 3: Drop the highlight
To create this glossy effect, the same method as the full lips. You can use an eraser to clean off the area where the highlight will be. You can go back to add some shading if you erase too much.
When you finish this step, just follow the same method of the full lips on step 4.
Even though we have different shapes, size or color of our lips. The method is pretty much the same. Be versatile and keep trying. You are now a step closer to draw nicely.